
Hello dear friends, we have finally put our cookbook in an E-book form!
Please visit the link below to purchase and down load your very own copy...


Genesis 1:11-12
And God said, Let the earth bring forth grass, the herb yielding seed, and the fruit tree yielding fruit after his kind, whose seed is in itself, upon the earth: and it was so.
And the earth brought forth grass, and herb yielding seed after his kind, and the tree yielding fruit, whose seed was in itself, after his kind: and God saw that it was good.


Normandy Apple Tart
1 batch of sweet tart dough enough for a 9 inch pan, partially cooked (about 8 min. )and cooled
For the filling:
2-21/2 cups of pear or applesauce
For the topping:
2 medium granny smith apples
1 egg, beaten with ½ tsp. water for egg wash
First make your tart dough and cool it all the way through. Next pour apple/pear sauce into crust till it reaches almost to the top of the crust. Peel and core apples for topping. Cut each apple into 4 pieces, and then slice into 7 thin sections. Arrange the slices in slightly overlapping concentric circles on the applesauce, starting at the edge and laying them down so their tips are against the crust. After finishing laying the apples, brush with egg wash. Bake at 400 for 50 min. Don’t worry if the apples burn a little! Cool and serve with whipped cream or vanilla bean ice cream

1. Beef, extra lean: High in iron, a mineral that improves memory, alertness and attention span.
2. Beets: Contains phenylalanine, an amino acid that helps relay signals from one brain cell to another.
3. Blueberries: Excellent source of antioxidants and “anthocyanins,” compounds thought to help protect brain cells from toxins, improves use of glucose in the brain, and promotes communication between brain cells.
4. Broccoli: Packed with antioxidants and phytonutrients that help protect brain tissue from toxins.
5. Carrots: High in beta carotene and other natural substances that help protect brain tissue from toxins.
6. Chicken: High in tyrosine, an amino acid required for the production of the alertness chemicals dopamine, epinephrine and norepinephrine. When your brain is producing these, you think and react more quickly, and feel more motivated, attentive and mentally energetic.
7. Citrus fruits: Contain vitamin C and other antioxidants that help maintain sharp memory and help brain cells resist damage.
8. Edamame: Contains phenylalanine, an amino acid that helps relay signals from one brain cell to another.
9. Eggs: High in the B vitamin choline, which helps with memory.
10. Egg whites: High in protein, which can improve alertness by increasing levels of norepinephrine, which helps keep your brain at its sharpest.
11. Hot chilies: Contains the fiery-tasting chemical capsaicin. Capsaicin stimulates circulation, aids digestion, opens your nasal passages and, even better, sends a feeling of euphoria straight to your brain.
12. Legumes: Provide glucose to fuel the brain, and the fiber they contain slows the absorption of glucose, helping to maintain stable levels of energy and support alertness and concentration overtime.
13. Pork: Loaded with vitamin B1, which protects myelin, a fatty substance that helps facilitate communication among cells.
14. Romaine lettuce: High in folate, a B vitamin important for memory and nerve cell health.
15. Spinach: Packed with iron, which is involved memory, concentration, and mental functioning.
16. Tuna: Full of omega-3 fatty acids, which help build and maintain myelin.
17. Yogurt: A probiotic food that has been found in many studies to boost mental alertness.


1/3 cup sweetened or unsweetened shredded coconut, toasted
4 tablespoons melted coconut oil,
6 large eggs
1/4 cup honey
1 teaspoon pure vanilla extract
1/4 teaspoon salt
1/2 teaspoon baking soda
1/3 cup coconut flour
2 tablespoon mashed bananas
Toppings:
Sliced banana
Fresh Blueberries
Almond Butter
Maple syrup
Unsweetened coconut flakes
Place a rack in the center of the oven and preheat to 200 degrees F.
Place coconut on a baking sheet and toast in the oven for about 6 minutes. Keep an eye on the coconut, it browns and burns quickly.
Remove toasted coconut from the oven and set aside.
In a medium bowl, whisk together coconut oil, eggs, agave nectar, vanilla extract, and mashed bananas. Whisk until well incorporated.
In a small bowl, whisk together the coconut flour, salt, and baking soda. Work the mixture with your fingers to ensure that the coconut flour doesn’t have any lumps in to.
Whisk the dry ingredients into the wet ingredients. Mixture will begin to thicken as you whisk. Add the toasted, shredded coconut and whisk to incorporate. Allow mixture to sit for 5 minutes while you plug in and preheat your griddle. Drop the batter by 1/4 cup fulls on hot griddle that has been greased with coconut oil. Bake about 2-3 min. on first side, flip and cook another minute or so, the 2nd side cooks faster so watch it closely! Put in oven to keep warm while you finish the rest of the batter. When ready to serve dab the top of each hotcake with a little almond butter, slice extra banana and sprinkle blueberries on top. Last of all drizzle with a little maple syrup. Enjoy this absolutely amazing pancakes!
 A few weeks ago, Esther and I held a tea party at our house for a few of the young girls, and their mothers, that attend our church. While we were planning the menu for that special day, a friend sent us a recipe for homemade rees cups! They looked so cute and petite, we just had to add them to the tea menu. If you would like to indulge yourself on a rees, but don't want to feel guilty;-) Then give this recipe a try, its sure to fulfil any chocolate pb, cravings you have!Homemade, Healthier Peanut Butter Cups
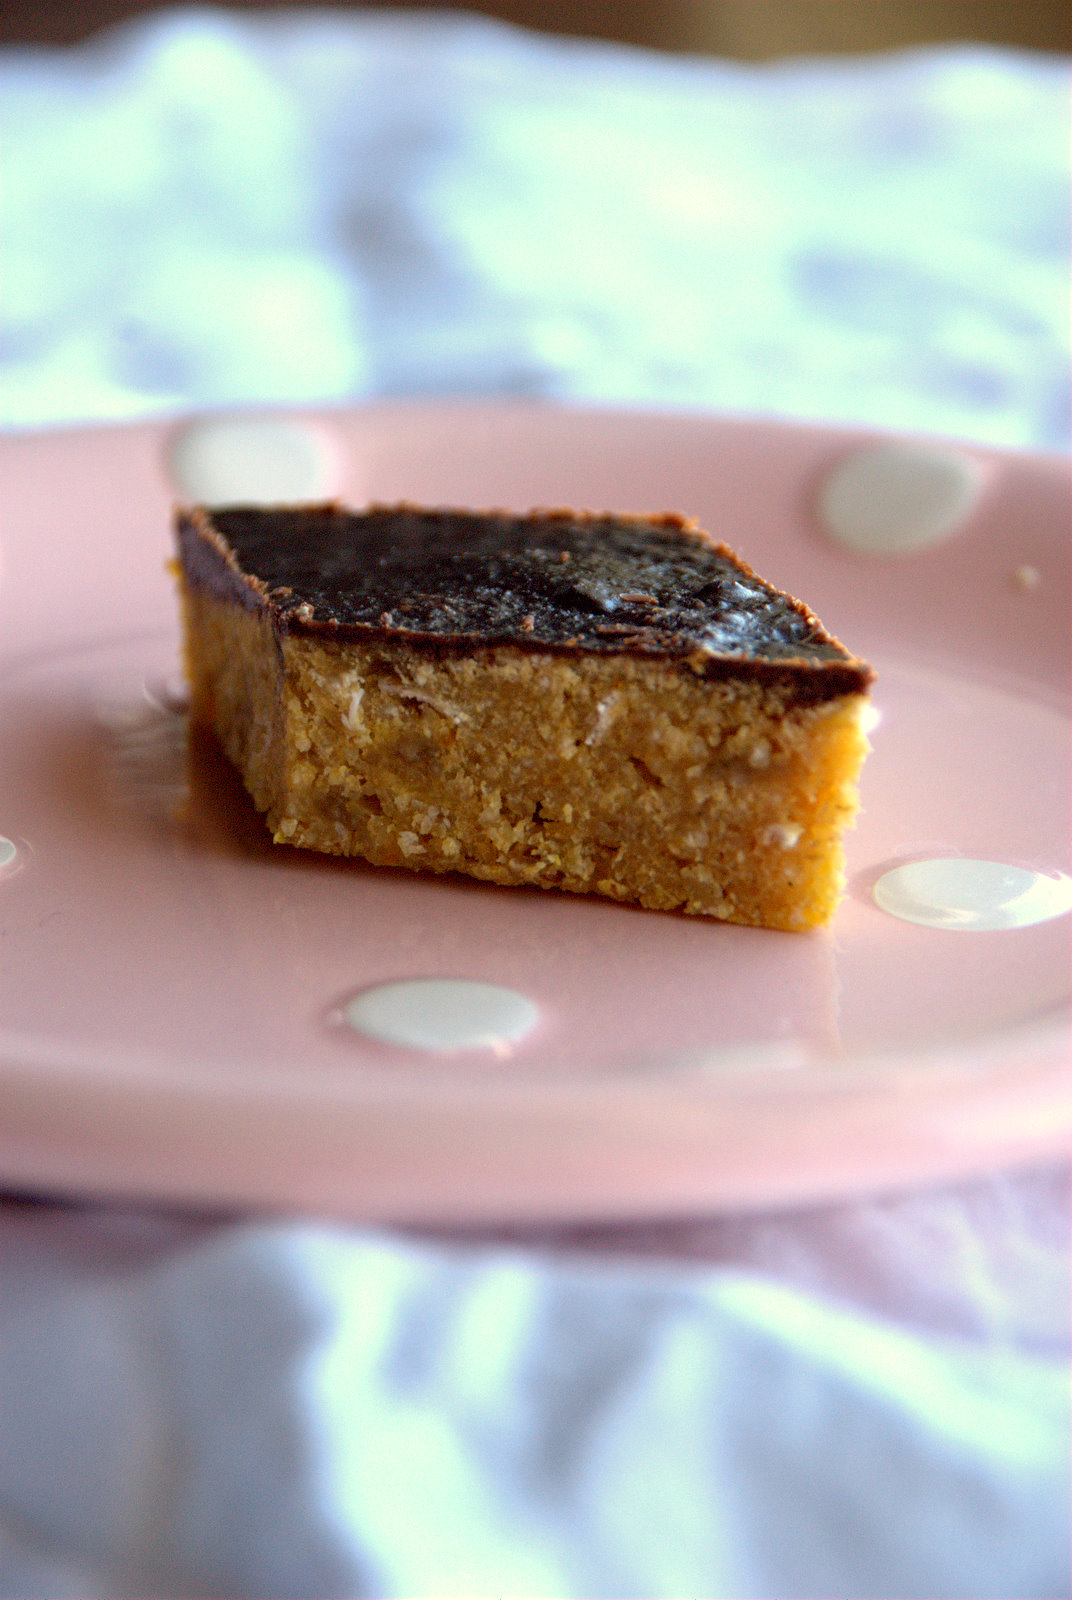
Monkey Bars
Ingredients:
Directions:
 Basil Pesto


Brown-Sugar Apple Cheesecake
From Baking from my home to yours by Dorie Greenspan
For the crust
For the apples
For the filling
To make the crust, first butter the bottom and sides of a 10″ spring form pan.
Break up the graham crackers and put them in your food processor, pulsing until you have 2 cups worth of fine crumbs. Stir in the ginger.
Melt the butter and pour it over the graham cracker crumbs, stirring until the mixture is moist and crumbly. Press the crumbs into the bottom of the pan and up the sides, as far as it will go. Put the pan in the freezer while you preheat the oven to 350 degrees.
When the oven has been preheated, remove the pan from the freezer and wrap the bottom in aluminum foil. Place the pan on a baking sheet and bake for 10 minutes or until the crust is lightly browned. Cool on a rack while you make the filling and cook the apples.
To cook the apples, melt the butter in a large skillet over medium-high heat. Pour in the apple slices and cook until golden brown. Sprinkle the apples with the brown sugar and cook a few minutes longer.Put a pot of water on to boil and get a roasting pan large enough to hold the spring form pan ready. To make the filling, beat the cream cheese on medium speed, scraping down the sides of the bowl often, for about 4 minutes. Add the sugars and beat an additional 2 minutes.
Beat in the cider, vanilla, and cinnamon. Reduce the speed to low and beat in the eggs one at a time. Then, beat in the sour cream and heavy cream until well-combined.
To assemble, pour about a third of the batter into the crust.
Spoon the apples on top of the poured batter.Cover with the remaining batter.Place the spring form pan on the roasting pan, and then pour in enough boiling water to come halfway up the sides of the spring form pan.Bake the cheesecake for 45 minutes, and then cover the cheesecake with a foil tent to prevent excessive browning. Bake an additional 45 minutes to an hour. If the center still isn't quite set when you remove it from the oven, that’s okay. Transfer the cheesecake to a cooling rack, and let it cool to room temperature. Refrigerate for at least 6 ours; overnight is best. When ready to serve, run a knife around the edges of the pan to loosen the crust. Then, open the latch on the pan and remove the sides.Serve plain, or with a dollop of whipped cream.


